House Sewer System Line & Plumbing Diagram: How to Read It
A house sewer system line and plumbing diagram helps you understand how wastewater leaves your fixtures, moves through your home, and exits toward the street. It is most useful when you want to identify the main parts of the system, communicate clearly about a problem, or understand what a plumber is referring to during an inspection. This guide focuses on how to read a typical residential layout and apply it to what you see at home, whether your property has a basement, crawl space, or slab foundation.

What does a house sewer system line and plumbing diagram actually show?
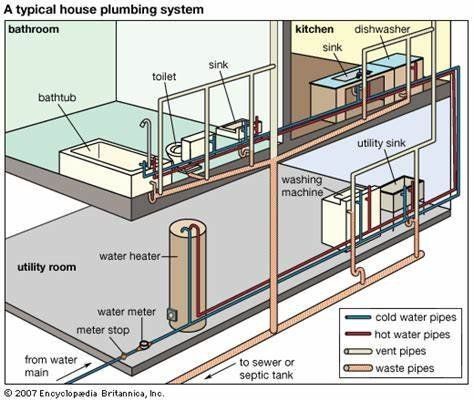
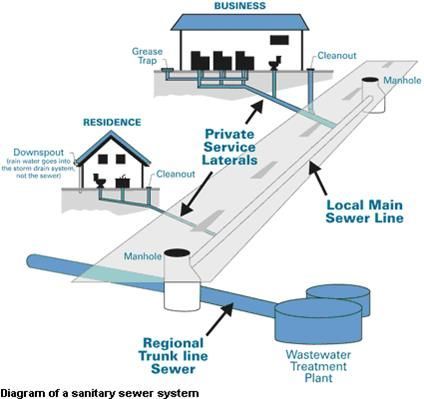
A house sewer diagram shows the path wastewater takes from sinks, toilets, tubs, showers, and appliances to the home’s main drain, then out through the private sewer lateral toward the public sewer main. In a simple layout, smaller branch drains connect to a larger main line, the main line exits the structure, a cleanout provides access, and the buried lateral continues toward the street or alley connection.
Most homeowners do not need to read the diagram like an engineer. The practical goal is to answer four questions: where the waste leaves the house, where the cleanout is likely to be, which buried section is private, and which part of the system probably deserves a closer look when symptoms appear. If you want a broader view of the underground line services we handle across Denver, start with the Denver Sewer & Water services overview page, which covers sewer lines, water lines, drains, storm drains, fire lines, and septic systems with both repair and replacement options.
Which labels matter most on a house sewer diagram?
The most important labels are the ones that help you trace flow and identify access points. If you can recognize branch drains, the main building drain, the cleanout, the private sewer lateral, and the public sewer main, you can usually understand the layout well enough to describe a problem accurately.
| Diagram label | What it means | Where it is usually shown | Why it matters |
|---|---|---|---|
| Branch drain | A smaller drain line serving one fixture or one room group | Under bathrooms, kitchens, laundry areas, or within walls | Helps you tell whether a problem is isolated or tied to a larger line |
| Main building drain | The larger drain that gathers wastewater from branch lines before leaving the house | Lowest floor, crawl space, basement ceiling, or under a slab | Tells you where the whole house system comes together |
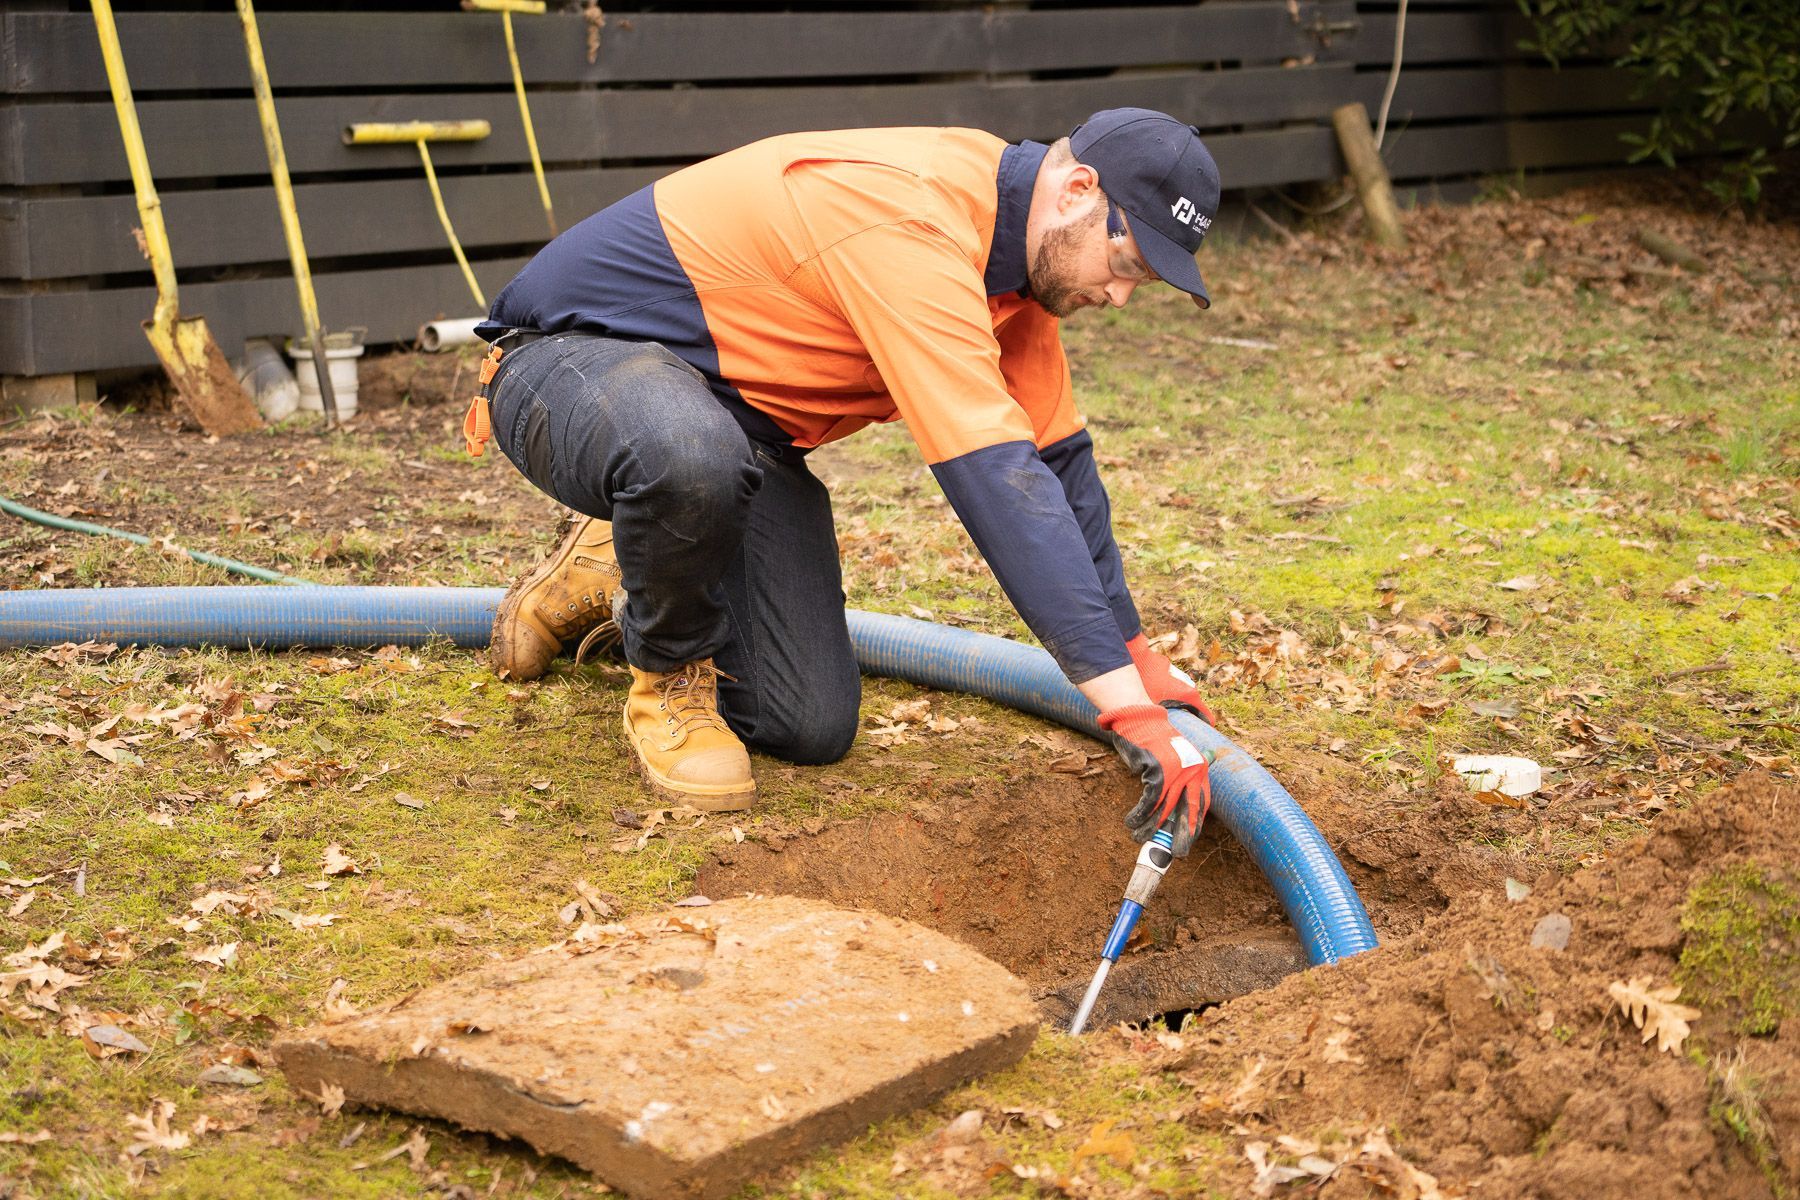
| Cleanout | An access point with a removable cap for clearing or inspecting the line | Near the foundation, in a basement, garage, utility space, or yard | Gives direct access for testing, rodding, or camera work |
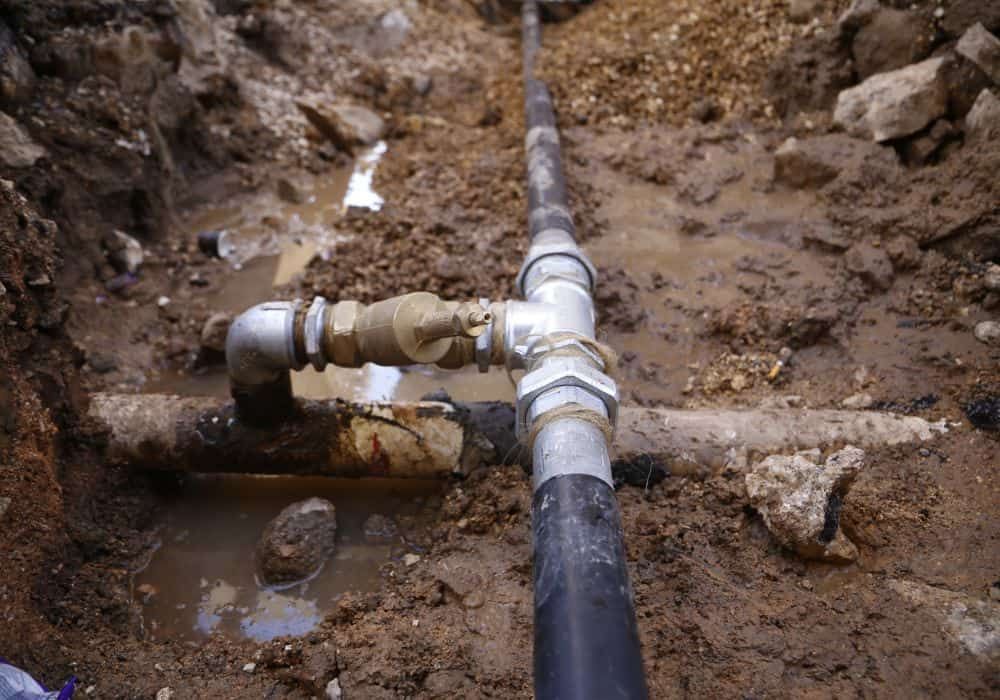
| Private sewer lateral | The buried pipe carrying waste from the house to the city connection | Between the foundation exit and the street, alley, or easement | This is the section homeowners usually need to maintain |
| Public sewer main | The city-owned sewer line serving multiple properties | Under the street, alley, or public right-of-way | This is the public side of the system, not the home’s private line |
| Vent stack or soil stack | Vertical piping that helps drains flow properly and releases gases safely | Through walls and out the roof | Helps explain gurgling, siphoning, and other drainage behavior |
The City of Denver’s utility locate guidance explains that the city locates only main sewer lines, while the service line (lateral) is the property owner’s responsibility all the way to the tap into the main—an important distinction when reviewing diagrams or determining ownership.
How do you read the flow from fixtures to the street?
The easiest way to read a plumbing diagram is to follow the wastewater path in order, from the fixture outward. Start small, then move larger. That keeps you from jumping straight to the street connection and missing how the home actually joins together inside.
Start at the fixture groups
Look for bathrooms, kitchens, laundry areas, and floor drains first. These are the places where smaller drain lines begin. On a typical drawing, each group feeds into a nearby branch drain before tying into a larger line.
Find where the branches combine
Once you identify the branch drains, look for the larger horizontal line or vertical stack that collects them. This is the part that usually tells you whether a symptom is likely to affect one room or the whole house.
Follow the exit point
After the branches combine, the line leaves the structure through a foundation wall, crawl space, or slab route. From there, the diagram usually shifts to the private lateral outside the house and then the public main farther away.
Use the cleanout as your real-world landmark
A cleanout is often the easiest feature to match between a diagram and the physical home because it is an access point rather than just a hidden pipe. If the drawing shows a cleanout near the front wall, side yard, or utility area, that gives you a reliable place to orient the rest of the system.
Checklist: how to read your diagram without overcomplicating it
- Start with the fixture that is having the problem
- Trace that fixture’s branch drain to the larger line it joins
- Identify where multiple branches combine into the main building drain
- Look for the cleanout shown nearest the structure or property line
- Mark where the pipe exits the house and becomes the buried lateral
- Separate the private lateral from the public main before assuming who is responsible
- Note any unusual turns, long runs, or older materials shown on the plan
- Compare the drawing with what you can physically access at the home
If you need help confirming which buried line is which before work starts, our
sewer line locating and troubleshooting page explains how we trace underground routes and problem areas.
How do you match the diagram to what you can see at home?
You do that by pairing the drawing with the few sewer components that are actually visible. Most of the system is hidden, so the goal is not to expose the whole line. The goal is to find fixed landmarks that help you orient yourself.
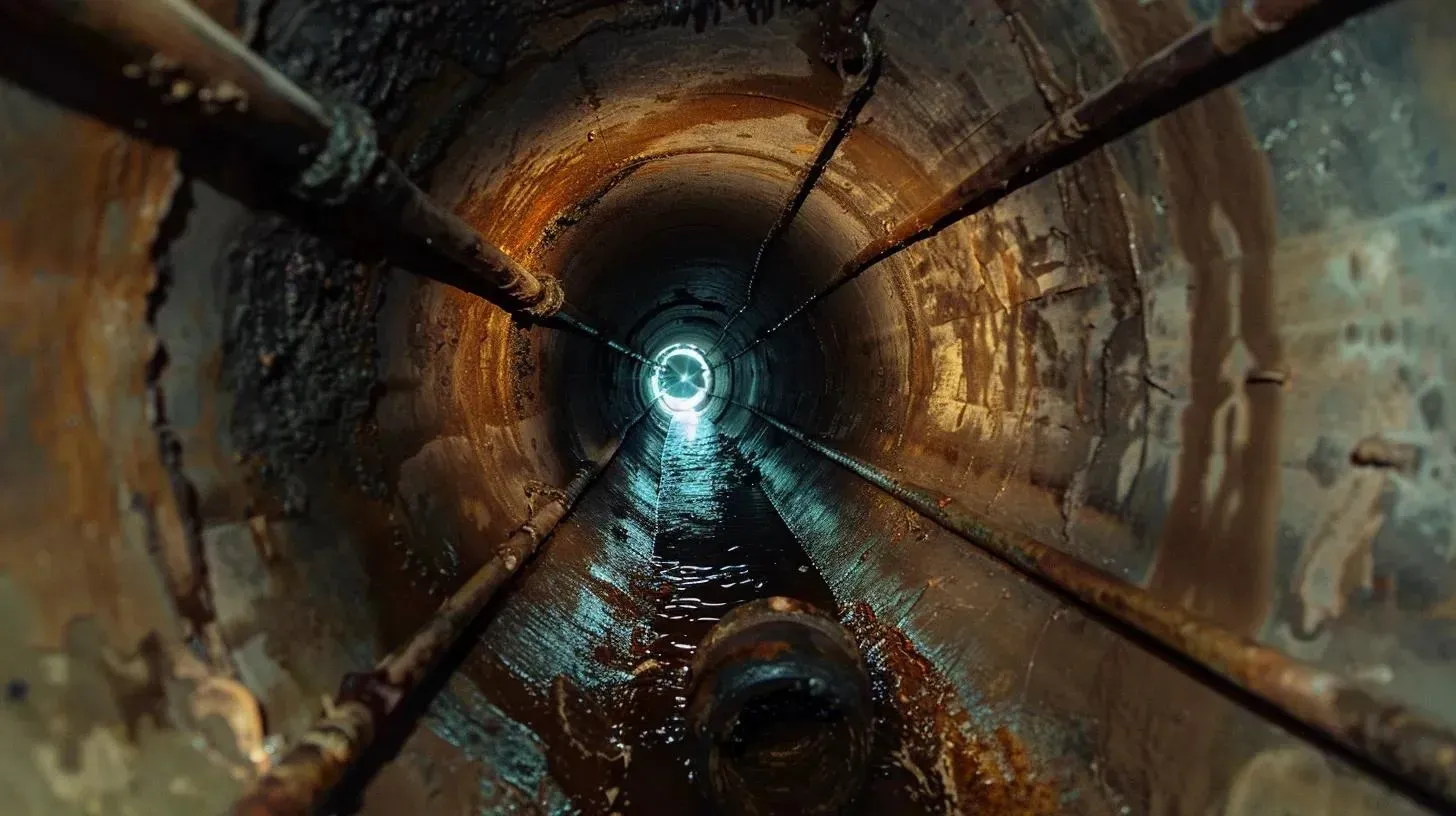
In many homes, those landmarks are the main stack, the line exiting the foundation, and the cleanout access point. In a basement home, you may see a larger drain line running below joists or along a wall before it heads out. In a slab home, the diagram matters even more because more of the drainage path is hidden beneath the floor.
Mini-scenario 1: A Denver homeowner in an older bungalow has a cleanout near the front foundation wall and repeated backups in the basement bathroom. The diagram shows that bathroom branch connecting near the house exit, which suggests the trouble may be in the main building drain or just beyond the wall rather than in a single sink branch.
Mini-scenario 2: A homeowner in a slab-on-grade home sees gurgling in two bathrooms on opposite sides of the house. The diagram shows both bathroom branches meeting under the slab before the line runs toward the front yard. That layout makes it easier to understand why two separate rooms can show symptoms from one shared line.
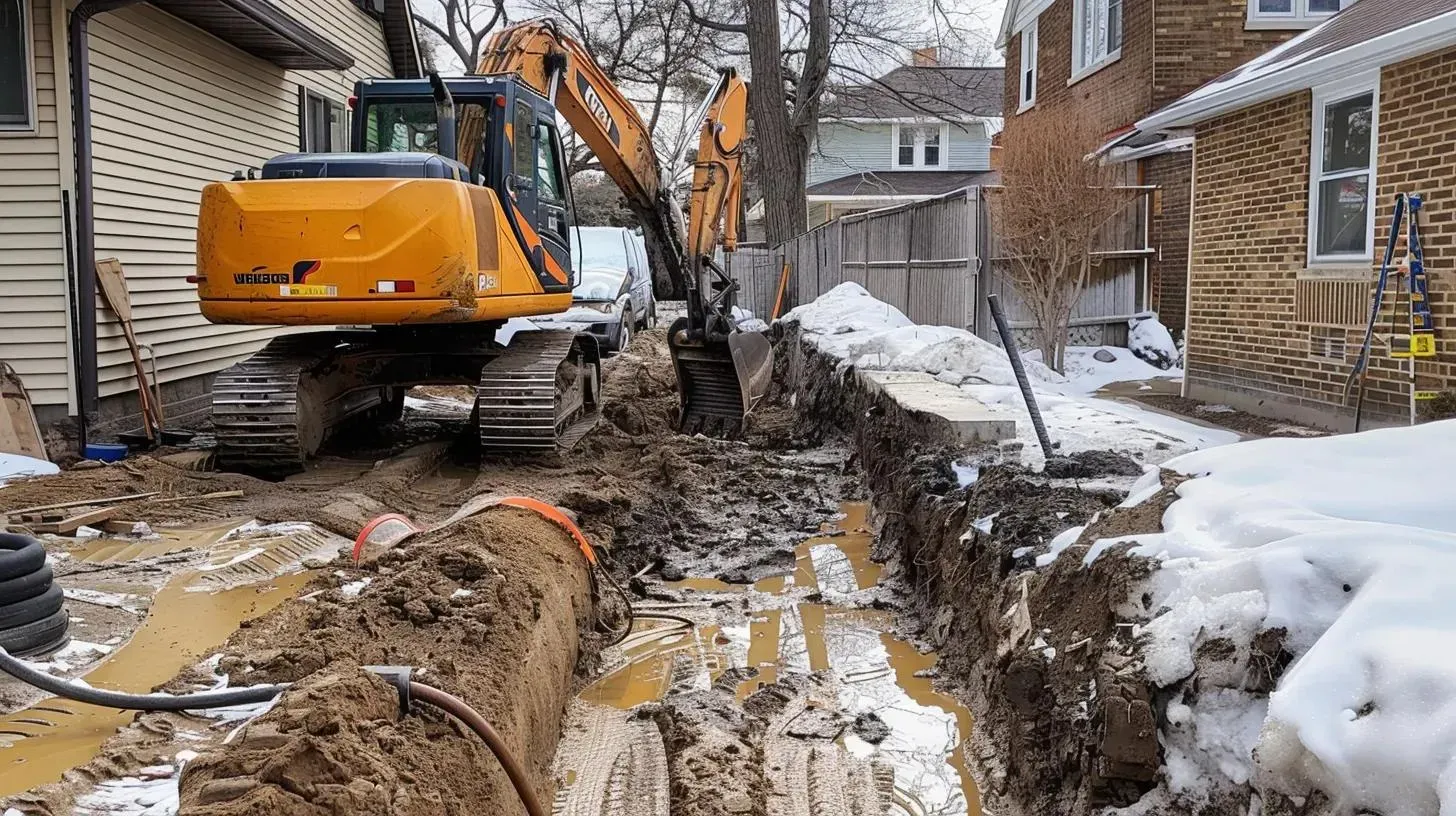
If the layout on paper still leaves too much uncertainty, a sewer camera inspection is often the fastest way to confirm whether the line path, slope, and condition match what the diagram suggests. You can review that process here-Sewer line scope video inspection.
What changes in older homes or remodels?
Older homes and updated homes often differ from the simplest textbook diagram. A basic sewer diagram may show one clean route from the house to the street, but real homes can have rerouted fixtures, added bathrooms, replaced sections of pipe, or abandoned lines that no longer serve anything.
That is why an old diagram should be treated as a starting point, not the final word. The City of Denver’s sewer use and drainage permit (SUDP) guidance explains that remodels, additions, and construction affecting sewer use or drainage often require permits and review, which is one reason approved plans and real-world layouts may differ over time.
Older homes also deserve closer attention when the drawing suggests cast iron, clay, Orangeburg, unusual turns, or long buried runs with mature trees above them. Those details do not automatically mean failure, but they do make the diagram more valuable because they point to the sections worth monitoring first.
Which red flags on the diagram should lead to a closer inspection?
The main red flags are features that make the line harder to clear, inspect, or maintain. Long exterior runs, abrupt changes in direction, missing accessible cleanouts, older materials, and multiple fixtures tying into the same section near the house exit are all reasons to pay closer attention.
A diagram is especially helpful when symptoms and layout begin to line up. If the drawing shows several fixtures feeding one shared section and you are seeing backups or gurgling in more than one fixture, that is stronger evidence of a main-line issue than a simple local clog. If the issue appears to be in the city sewer line rather than the private line, Denver’s Wastewater Management FAQ explains that the city will service the line if the problem is found there and will tell you if the issue is in the private line instead.
Next step is to use the diagram to narrow the suspect area rather than to guess at a repair. That usually saves time, keeps the conversation focused, and helps determine whether locating, camera work, cleaning, repair, or replacement makes the most sense.

What mistakes do homeowners make when reading sewer diagrams?
The most common mistake is assuming the first visible drain or cleanout is the whole problem area. In reality, a cleanout is only an access point. It does not always tell you exactly where a clog, break, or low spot is located.
Another mistake is treating a generic online plumbing diagram as if it were the exact layout for the property. Generic diagrams are helpful for understanding system logic, but the actual route, depth, materials, and access points can vary a lot from house to house.
A third mistake is skipping the difference between a private lateral and the public main. That boundary matters for responsibility, troubleshooting, and deciding what kind of help is needed.
Common mistakes and red flags to watch for
- Assuming every home has the same cleanout location
- Confusing a vent stack with the main sewer line
- Treating an old remodel plan as if nothing changed afterward
- Ignoring signs that multiple fixtures share one problem section
- Assuming the city is responsible for the whole line to the house
- Reading the diagram without comparing it to real landmarks on the property
FAQ about house sewer system line and plumbing diagrams
Is the main drain the same as the sewer lateral?
No. The main drain is the larger line inside the home that collects wastewater from branch drains. The sewer lateral is the buried line outside the home that carries wastewater from the house to the public sewer main.
Does every house have the cleanout in the same place?
No. Cleanouts can be indoors or outdoors depending on the home’s age, layout, and how the drainage system was built or updated.
Can I rely on an old sewer diagram after a remodel?
Only as a starting point. Remodels, additions, reroutes, and line replacements can change the real path of the system.
When should I stop reading the diagram and get the line checked?
If multiple fixtures are backing up, sewage is surfacing, gurgling is getting worse, or the layout suggests a shared main-line section is affected, it is time to move from diagram-reading to actual diagnosis.
Final takeaway
A house sewer system line and plumbing diagram does not need to be complicated to be useful. Once you understand where the branches combine, where the line exits the house, where the cleanout sits, and where the private lateral ends, you can make better decisions and explain problems much more clearly.
If you want a clear next step for sewer, water line, drain, or excavation issues in Denver, start with our main services overview here.